paint guide
Ultimate Paint Guide: A Comprehensive Overview
This ultimate paint guide offers a comprehensive look into the world of paint. From selecting the perfect colors for your home to exploring the diverse range of finishes and sheens available‚ we aim to provide you with the knowledge needed for successful projects.
Choosing the Right Paint Color
Selecting the right paint color is a crucial step in any painting project. It’s more than just picking a shade you like; it’s about understanding how colors interact with light‚ space‚ and your existing décor. Our comprehensive guide simplifies this process‚ offering a four-step method to confidently choose colors for your home.
Consider the room’s purpose and mood. Do you want a calming bedroom or an energetic living space? Light colors can make a room feel larger and airier‚ while darker hues add warmth and intimacy. Natural light plays a significant role; test paint samples in the room at different times of the day to see how the color shifts.
Don’t underestimate the power of undertones. Even a seemingly neutral color can have subtle hints of warm or cool tones that can clash with your furniture or flooring. Using peel-and-stick paint samples like Samplize can be a great way to see the color in your room without the commitment of painting a sample area.
Finally‚ think about the overall color scheme of your home. Do you want each room to have its own distinct personality‚ or do you prefer a cohesive flow? Choosing the right paint color is an investment in your home’s aesthetic and your personal enjoyment of the space.
Understanding Paint Sheens and Finishes
Once you’ve chosen your perfect paint color‚ the next crucial step is understanding paint sheens and finishes. The finish of your paint affects not only its appearance but also its durability and washability. Most paint companies offer five to six standard finishes‚ each suited for different areas and needs within your home.
The primary differences between sheens are luster (or shine) and how easily they can be cleaned. Flat and matte paints have the least amount of shine‚ making them ideal for low-traffic areas like bedrooms or ceilings‚ where hiding imperfections is a priority. However‚ they are more difficult to clean.
Eggshell and satin finishes offer a slight sheen and increased durability‚ making them a good choice for living rooms or hallways. They are easier to wipe clean than flat paints. Semi-gloss and gloss finishes are the most durable and easiest to clean‚ making them perfect for kitchens‚ bathrooms‚ and trim work‚ where moisture and frequent cleaning are common.
Choosing the right sheen depends on your specific needs and the aesthetic you want to achieve. Consider the room’s function‚ the amount of traffic it receives‚ and the level of moisture present when making your decision. A well-chosen sheen can enhance the beauty and longevity of your paint job.
Essential Painting Tools: Trim Guides and Shields

Achieving a professional-looking paint job requires not only the right paint but also the right tools. Among these‚ trim guides and shields are invaluable for creating clean lines and protecting surfaces from unwanted paint splatters. Handheld trim guides are excellent for maintaining a straight line when painting corners or tight spaces. They are easy to hold and eliminate the worry of paint bleeding through‚ a common issue with masking tape.

Paint shields‚ on the other hand‚ are designed to protect walls‚ woodwork‚ and other non-painted surfaces from splatter and over-painting. These tools help you achieve perfect‚ crisp edges when applying coatings. They are particularly useful for concrete professionals and DIYers alike‚ ensuring a neat and tidy finish.
These guides and shields often feature a straight edge for smoothing drywall or wall coverings‚ adding to their versatility. Ideal for painting‚ trimming‚ or smoothing‚ these tools fit snugly into corners‚ providing a clean‚ professional edge. Many painters find them indispensable‚ especially when working with acrylics to create straight lines and geometric shapes.
Investing in quality trim guides and shields is a smart move for anyone looking to elevate their painting projects. They save time‚ reduce mess‚ and ensure a flawless finish every time.
Achieving Straight Lines and Crisp Edges
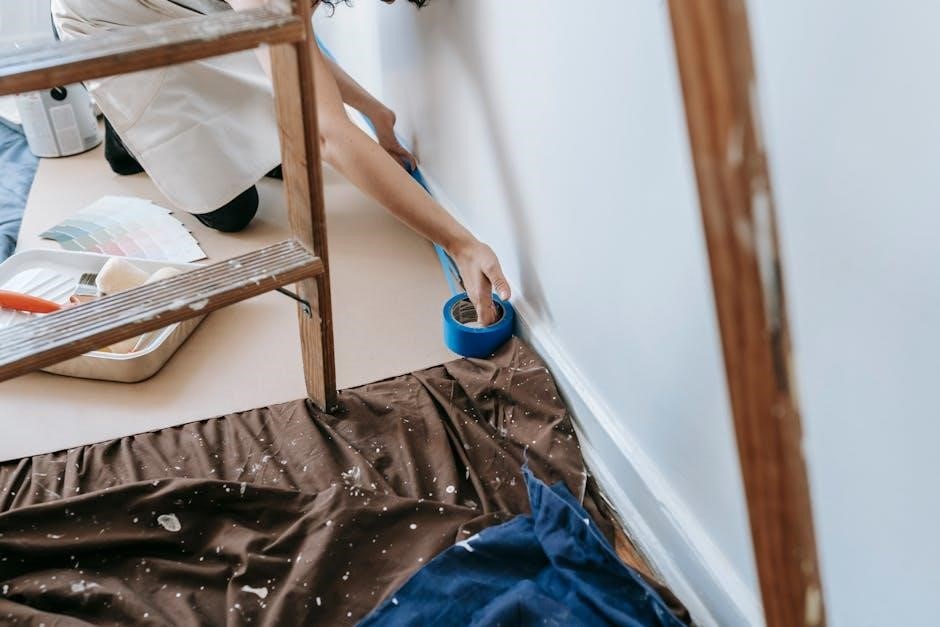
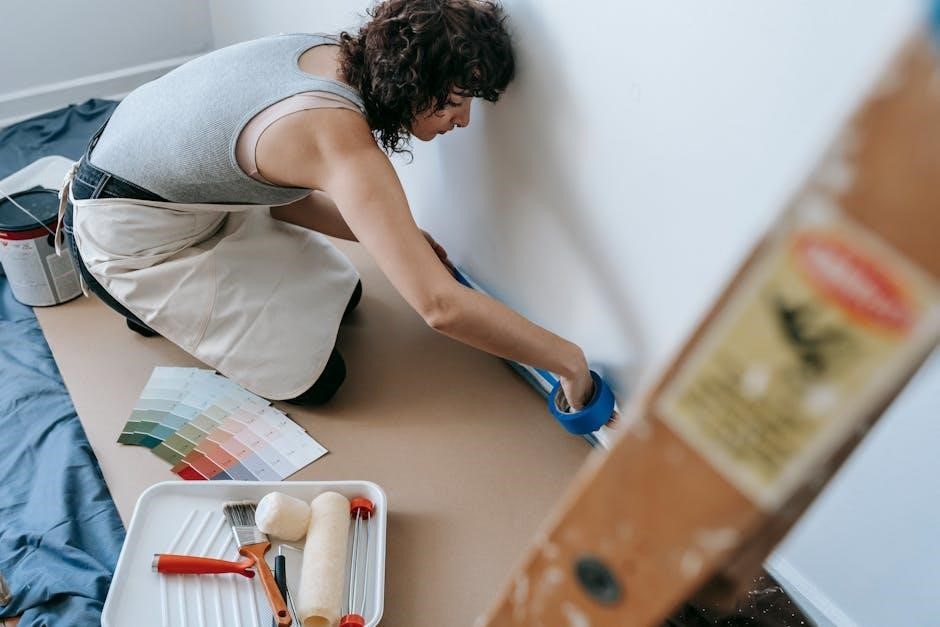
Achieving straight lines and crisp edges is a hallmark of a professional paint job. This requires careful preparation‚ the right techniques‚ and quality tools. One essential tip is to use painter’s tape properly. Apply the tape firmly‚ ensuring there are no gaps where paint can seep through. For best results‚ use a putty knife or a similar tool to press down the edges of the tape.
Another effective method involves using trim guides and shields. These tools provide a physical barrier‚ preventing paint from straying onto adjacent surfaces. Handheld trim guides are particularly useful for corners and tight spaces‚ allowing for precise control and clean lines. Paint shields protect larger areas‚ such as walls and woodwork‚ from splatters and over-painting.
When painting‚ apply the paint in thin‚ even coats‚ avoiding excessive pressure that can cause bleeding under the tape or guide. After applying the paint‚ remove the tape while the paint is still slightly wet. This prevents the paint from drying and peeling off with the tape‚ ensuring a clean and crisp edge.
For those seeking even greater precision‚ consider using specialized tools like edge painters or fine-tipped brushes. These tools allow for meticulous application‚ perfect for intricate details and tight spots. With the right techniques and tools‚ achieving professional-looking straight lines and crisp edges is within reach for any DIY enthusiast.
Paint Types: Enamel‚ Acrylic‚ and More
Navigating the world of paint requires understanding the various types available‚ each with its unique properties and applications. Enamel paints‚ known for their durability and glossy finish‚ are ideal for surfaces requiring a tough‚ resilient coating. They are often used on metal‚ wood‚ and other surfaces prone to wear and tear. However‚ enamel paints typically require longer drying times and may contain higher levels of VOCs (volatile organic compounds).
Acrylic paints‚ on the other hand‚ are water-based and offer excellent versatility. They dry quickly‚ are low in VOCs‚ and provide good color retention. Acrylics are suitable for both interior and exterior applications‚ making them a popular choice for walls‚ ceilings‚ and trim. Within the acrylic family‚ there are various formulations‚ including latex acrylics‚ which offer enhanced durability and resistance to mildew.
Beyond enamel and acrylic‚ other specialized paints cater to specific needs. Epoxy paints‚ known for their exceptional hardness and chemical resistance‚ are commonly used in industrial settings and for coating floors. Milk paints‚ made from natural ingredients‚ offer a matte finish and are often used for furniture and decorative projects. Understanding the characteristics of each paint type allows you to make informed decisions and achieve the best results for your painting projects. Whether you need a durable finish‚ vibrant color‚ or eco-friendly option‚ there’s a paint type to suit your requirements.
DIY Painting Projects: A Step-by-Step Guide
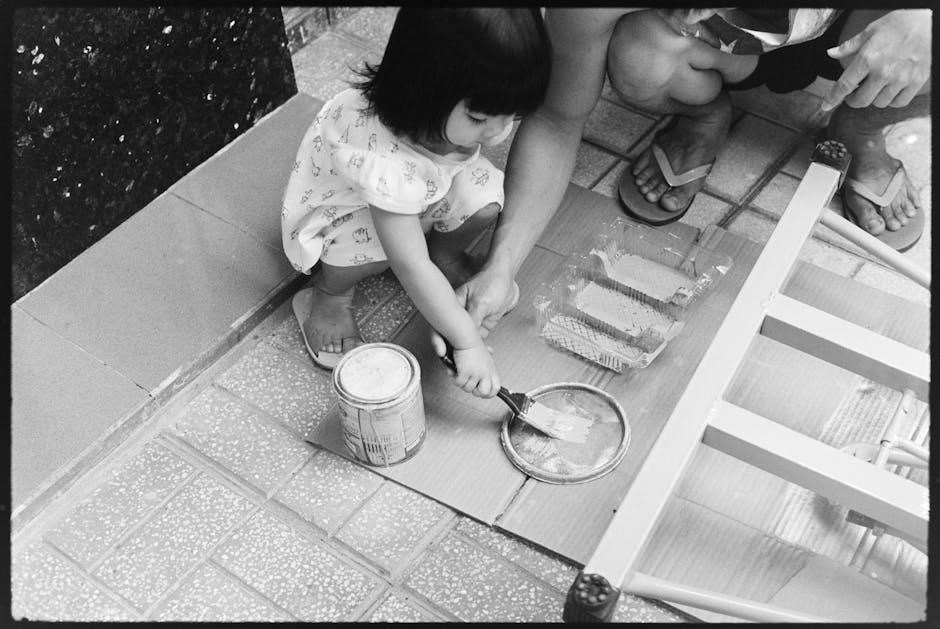
Embarking on DIY painting projects can be rewarding. Start by selecting a project and gather your supplies: paint‚ brushes‚ rollers‚ tape‚ drop cloths‚ and cleaning materials. Proper surface preparation is key: clean‚ sand‚ and prime the area to ensure good paint adhesion.
Next‚ protect your surroundings with drop cloths and tape off areas you don’t want to paint. Apply the first coat of paint using smooth‚ even strokes‚ following the manufacturer’s instructions for drying time. For walls‚ start with the edges using a brush‚ then fill in the larger areas with a roller.
Once the first coat is dry‚ inspect for imperfections and lightly sand any rough spots. Apply a second coat for full coverage and enhanced durability. Remove the tape carefully to reveal crisp‚ clean lines. Finally‚ clean your brushes and rollers thoroughly to prolong their lifespan. Consider starting with smaller projects‚ like furniture or accent walls‚ to build your confidence and skills. With careful planning and attention to detail‚ you can achieve professional-looking results and transform your living space with paint.
Interior Painting Techniques and Tips
Mastering interior painting techniques can elevate your home’s aesthetics; Begin by selecting high-quality brushes and rollers suited for your chosen paint type. For smooth walls‚ opt for a low-nap roller; for textured surfaces‚ a higher nap is preferable.
When painting‚ employ the “wet edge” technique to prevent lap marks. This involves maintaining a wet edge as you move across the surface‚ blending each stroke seamlessly. Start in a corner and work your way across in manageable sections.
Consider using a paint extender to slow down the drying time‚ especially in warm or dry conditions. This allows for better blending and reduces the risk of visible lines. For cutting in along trim and ceilings‚ use a high-quality angled brush and steady hand. If needed‚ use painter’s tape for extra precision.
Proper ventilation is essential for safety and to promote even drying. Open windows and use fans to circulate air. When painting ceilings‚ wear eye protection to prevent paint splatters. With practice and attention to detail‚ you can achieve a professional-quality finish in your interior painting projects‚ transforming your living spaces with color and style.
Exterior Painting: Park Home Considerations
Exterior painting of park homes requires special attention to detail‚ due to unique construction materials and environmental exposure. Begin by thoroughly cleaning the exterior surfaces‚ removing dirt‚ mildew‚ and loose paint. Power washing can be effective‚ but use caution to avoid damaging siding.
Inspect for any signs of damage‚ such as cracks‚ holes‚ or wood rot‚ and make necessary repairs before painting. Choose a high-quality exterior paint specifically designed for park homes‚ considering factors like UV resistance‚ weather protection‚ and compatibility with existing materials.
Apply a primer to ensure proper adhesion and durability‚ especially on bare surfaces. When painting‚ work in manageable sections‚ following the manufacturer’s instructions for application and drying times. Pay close attention to trim‚ windows‚ and doors‚ using appropriate brushes and techniques for clean lines and even coverage.
Consider the climate and weather conditions when planning your project‚ avoiding painting in direct sunlight‚ extreme temperatures‚ or during periods of high humidity. Regular maintenance and touch-ups will help extend the life of your paint job and protect your park home from the elements‚ ensuring long-lasting beauty and value.
Paint Protection: Films for Vehicles
Paint protection films (PPF) represent a significant advancement in vehicle care‚ offering a transparent shield against road hazards. These films safeguard against scratches‚ chips‚ and environmental damage‚ preserving the vehicle’s original paint finish. PPF is typically made from thermoplastic polyurethane‚ known for its durability and flexibility.
The application process involves meticulously cleaning the vehicle’s surface‚ followed by precise film installation. Professional installation is recommended to ensure proper adhesion and a seamless finish. PPF can be applied to high-impact areas like the hood‚ fenders‚ and bumpers‚ or to the entire vehicle for comprehensive protection.
Benefits of using PPF include maintaining the vehicle’s resale value‚ reducing the need for costly paint repairs‚ and enhancing its aesthetic appeal. Regular washing and waxing can further extend the film’s lifespan. When choosing a PPF‚ consider factors like thickness‚ clarity‚ and warranty coverage.
Advancements in PPF technology have introduced self-healing properties‚ allowing minor scratches to disappear with heat exposure. This ensures long-lasting protection and a flawless appearance. Investing in paint protection film is a proactive measure for preserving your vehicle’s beauty and value‚ providing peace of mind on the road.
Advanced Painting Techniques: Miniatures and Art
Delving into advanced painting opens doors to intricate worlds‚ particularly in miniatures and fine art. These disciplines demand precision‚ patience‚ and a mastery of various techniques. Miniature painting‚ often associated with models and figurines‚ involves applying thin layers of paint to achieve depth and realism. Techniques such as layering‚ highlighting‚ and shading are crucial for creating convincing textures and details.
In fine art‚ advanced techniques encompass a broader spectrum‚ including glazing‚ scumbling‚ and impasto. Glazing involves applying thin‚ transparent layers of paint to create luminous effects and subtle color variations. Scumbling uses dry brushing to create textured surfaces and atmospheric effects. Impasto utilizes thick paint application to create bold textures and emphasize light and shadow.
Understanding color theory is paramount in both miniature and fine art painting. Experimenting with color mixing‚ complementary colors‚ and tonal values allows artists to create visually compelling compositions. Mastering brush control is essential for achieving precise details and smooth transitions.
Exploring different mediums‚ such as oils‚ acrylics‚ and watercolors‚ can further expand an artist’s repertoire. Each medium offers unique properties and challenges‚ allowing for diverse artistic expression. Continuous practice and experimentation are key to honing advanced painting skills and developing a personal style.